
Wednesday, August 31, 2011

Buttermilk Cheddar Biscuits

IMG_4299

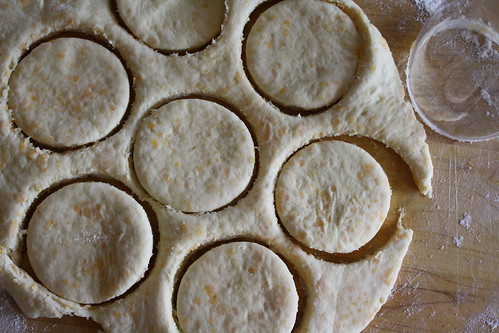
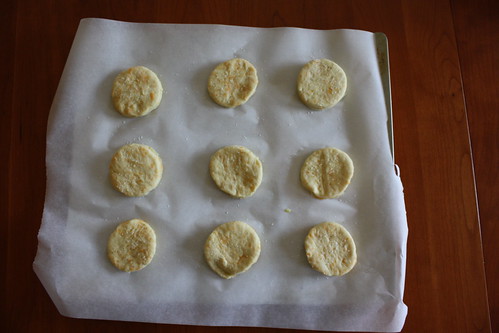
I found this recipe when I was a senior in college and lived in a studio apartment where my kitchen was my bedroom was my living room was my office. In that apartment, I made these biscuits with a wooden spoon and a bowl. This is the first time I’ve made them with a stand mixer, so I can attest that you’ll be fine without one. I own biscuit cutters, but they are in a storage box in the basement so I used a beer glass instead. You could also use a coffee mug, or cut them with a knife. Almost anything goes! (Yeah, college!) 
IMG_4274

I have absolutely no childhood memories of hot biscuits or a kitchen dusted with White Lily flour.  (I remember tubes of crescent rolls, which are culturally-relevant memories in their own right.) Biscuits do not comfort me with thoughts of home, but rather fall alongside other foods I’ve adopted as my own in the mishmash palate of things I have made and shared. These things, in particular, I made in college with my boyfriend who lived two hours away. We baked biscuits or orange sweet rolls on Saturday nights and watched the entire James Bond series over the course of a year in that tiny studio, pausing the scenes while we took baking pans out of the oven or dried dishes. This is how you assign meaning to food you did not grow up with: something is good and you share it.  There’s the context you were missing. 
IMG_4279

Before this cheddar version, I had only tried making one biscuit recipe: a cracked-pepper green onion interpretation that tasted like baked potatoes. The combination of butter, salt, and cheddar tugs at my heart a lot more. These biscuits are very forgiving and taste excellent alongside soup. They freeze so well that you can almost replicate the fresh-baked experience by grabbing two or four out of the freezer and microwaving them for a few seconds (a desperate snack). Eat them fast if you do this, though. There’s no time to lose, there’s no one home to see you do it!
IMG_4286

Buttermilk Cheddar Biscuits
Almost entirely from Ina Garten

Ingredients

2 c all-purpose flour, plus a handful to coat the cheese, and another handful to flour your workspace
1 tbsp baking powder
¾ tsp kosher salt (the original recipe calls for 1 ½ tsp, but I found this to be overkill–remember that the tops are also sprinkled with salt)
1 ½ sticks very cold (stick in the freezer while you prep and measure your ingredients) unsalted butter
½ c cold buttermilk
1 egg
1 c grated extra-sharp Cheddar (buy it in a block so you can avoid the anti-caking agents coating the cheese in the pre-shredded kind) 
Another egg, beaten with 1 tbsp water (this is your egg wash)
Salt for topping (a crunchy sea salt works great!) 


Directions

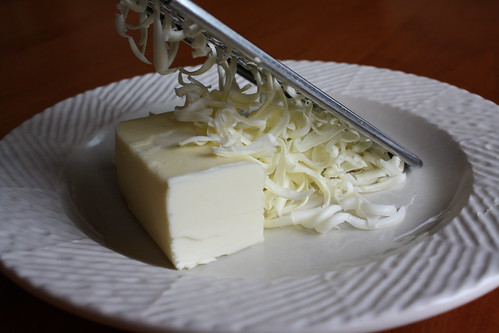
Heat oven to 425. Combine flour, salt, and baking powder in a mixing bowl. Add the butter (and quickly, because it’s going to melt), which I do by grating the sticks with a cheese grater into the mixing bowl while the mixer is running on low. 

Combine the buttermilk and egg in a small bowl and beat together. Add this mixture to the flour/butter combo and mix until moistened. 

Toss the shredded cheddar in a pinch of flour and add the cheese to the dough (mixer or arms on low). Mix until barely combined–you do not want to overwork your dough or the biscuits will be hard. 

Flour a counter or a big wooden cutting board, dump the dough out of the bowl, and knead the dough a few times (I think 3 turns is enough).  Roll out the dough so it is about ½ to ¾ inch thick. Dip your round cutter into flour and cut out biscuits. Move the cut biscuits to a baking sheet lined with parchment paper. You can also turn the leftover scraps of dough into biscuits, though they won’t be as uniform as the first batch. 

Brush egg wash lightly over biscuits and top with a small sprinkle of salt. A silicone brush is a perfect tool for this, but a folded-up paper towel also works. Bake for 20-25 minutes, until starting to brown. Eat while warm. 

Sunday, August 7, 2011

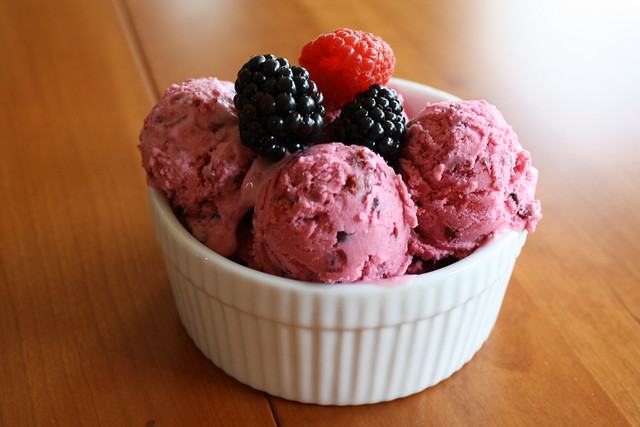
Raspberry Blackberry Frozen Greek Yogurt

IMG_4281

When I was living in Russia, I took an overnight train to Moscow and had to miss dinner. I had been there for three months and only missed dinner once before, when a few of us had tired of home cooking and we saw a Pizza Hut on the way home from school. I called the women I lived with (И. and З.) on my cell phone and triumphantly explained, “I will not be home today. I do not eat at home. We are eating in a restaurant!” (Imagine the entire dialog in Russian, their sentences significantly better crafted than mine.)

I heard a long pause and И. asked “Is it someone’s birthday?”

“No.”

“In the future, you will only go to restaurants for birthday parties! We do not eat in restaurants just because we want to.”

For weeks after, they reminded me of Pizza Hut when I sat down at the table. In mock surprise, И. would look at me when I entered the kitchen and say, “You’re here! There are no restaurant parties for you tonight?” З. was a kinder woman and did not endeavor to make me feel bad, but seemed to interpret my one night off from her cooking as a judgment on all her food. She was sorry there was no pizza, and I was sorry I had ever made that call.

IMG_4255

I told them I was going to miss dinner the night I left for Moscow, and after attempting to convince me to take a later train, И. conceded: “At least it’s not for a restaurant!” И. and З. sent me to Moscow with a plastic bag filled with my missed dinner: an egg sandwich, three hard boiled eggs, four pieces of bread, six apples, three oranges, five cookies, nine grapes (И. chased me down the stairs as I was leaving with a bowl of grapes and instructed me to take some “in case I got hungry”), a bag of crackers, an entire package of butter tea biscuits, four lemon hard candies, and two giant bars of expired chocolate.

IMG_4256

On the train, I opened those butter tea biscuits, and they must have been in that tiny kitchen soaking up the air for years because they tasted just like it. Cooked onions, dusty, and stale. That pizza had tasted like nothing familiar, and with a bite of an old biscuit, I found that I really did miss dinner.

IMG_4265

I found this lovely cookbook on sale and knew it would be coming home with me when I read this instructive list that echoed the elaborate trappings of an И. and З. picnic bag: “If you go down to the woods today…take a frying pan, a wooden spoon, some gingerbread, oat-cake batter, cheese, ham, eggs, salt, pepper, garlic oil, and potatoes with you.” I like the idea of being adequately prepared for a journey, the forethought that comes in collecting good food from home to bring with you somewhere new. It would be more appropriate for me to have chosen the oat cakes with ham and gruyère from the cookbook, but it has been so hot and this recipe sounded delicious. For a recipe so simple, there are all these words:

Raspberry Blackberry Frozen Greek Yogurt
Adapted from Alice’s Cookbook
Note: The original recipe in Alice’s Cookbook is called “The Easiest Frozen Yogurt with a Blackberry Swirl.” She warns that if you over-mix the berries into the yogurt base, you will have a “purplish yogurt instead of a swirl.” This sounded awesome to me, so I embraced the full union of berries and yogurt and also added raspberries.
Ingredients:
For the berry syrup:
1 vanilla bean
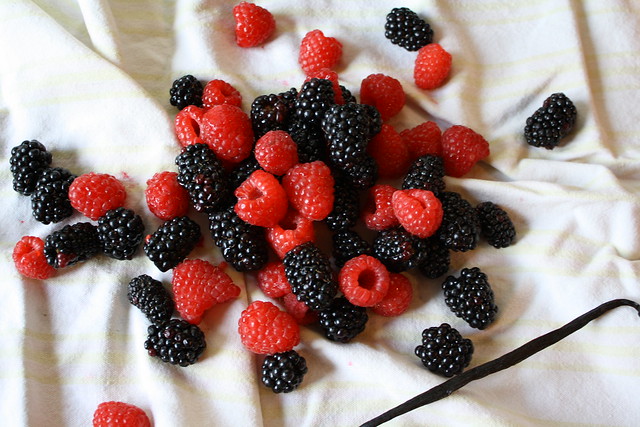
2 cups berries (I used 1 cup blackberries and 1 cup raspberries), plus more for serving
½ c sugar

For the yogurt base:
¾ c sugar
3 c plain full-fat Greek yogurt
Vanilla seeds scraped from bean

Directions
Berry syrup:
I would recommend making the berry syrup at least two hours before the yogurt, lest you find yourself with yogurt in the ice cream maker and still-hot syrup (I thought I would…test…this possibility for you. Nothing bad happens! It just, obviously, melts the frozen yogurt and the whole thing will take longer to freeze).

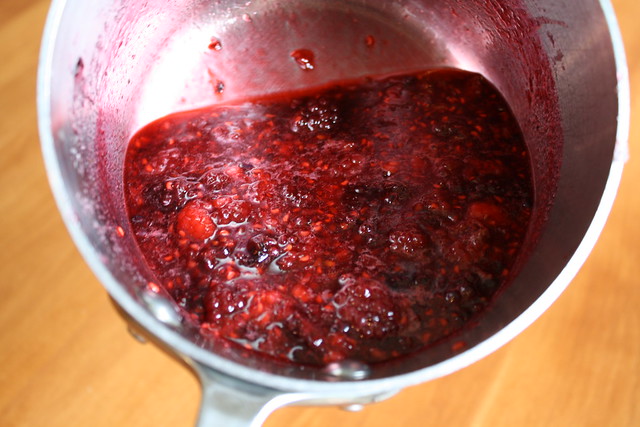
Slice the vanilla bean down the center and scrape out seeds, reserving for the yogurt base. Measure berries and sugar into a heavy saucepan, add vanilla bean, and heat over medium until the berries start to fall apart. Use the back of a wooden spoon to smash the berries against the pan sides; you want the berries to be almost fully broken down. When the berries form a thick syrup (after about 10 minutes), you’re done.

Put the berry syrup in the refrigerator to cool it down and watch a few old episodes of the X-Files.

Yogurt base:
Beat together the yogurt, sugar, and vanilla seeds until combined. That’s it!

The union:
Do you have an ice cream maker? If not, you can try to make one by putting a gallon bag of yogurt base inside a larger plastic bag filled with ice and rock salt. My instructions will assume the former.

Pour yogurt base into ice cream maker and turn on. Go check on your berry syrup; if the syrup is completely cooled, take out the vanilla bean. If you do not want seeds in your yogurt, you can strain the syrup through some cheesecloth.

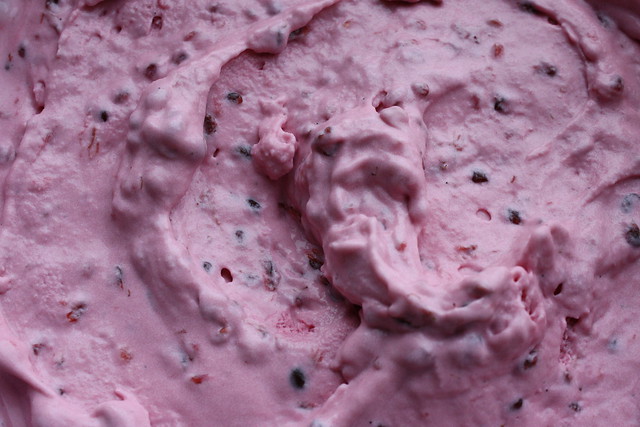
Once the yogurt base has thickened and partially frozen (about 15 minutes), pour in the berry syrup “to taste” (I had a fourth cup left before I decided “That’s enough of that!” and saved the rest*). Continue churning until the yogurt has reached the consistency of soft serve. There is a point when it just won’t get any colder in an ice cream machine, so scoop yourself a preview cup of the soft yogurt and put the rest in a large container in the freezer to firm for a few hours (or overnight). It gets very firm in the freezer, so let the frozen yogurt sit at room temperature for a few minutes before you scoop and serve.
*Do you have extra berry syrup? Put it on waffles or pancakes; swirl it into non-frozen yogurt; put it on top of the frozen yogurt you just made; drizzle it over pound cake; freeze it into ice cubes and put them into summer cocktails; mix it into balsamic vinegar and olive oil to make a great fruity dressing; eat it by the spoonful. All of those are endorsed options.

Wednesday, July 27, 2011

Shame on me.


IMG_1091


If you are ever three posts into your blog and start to do distracting things like graduate and apply for jobs and move back home, then at least end it cleanly. No one likes to drag things out. Put up a “I’ll be back soon!” post—maybe if you do, you will be back soon. I wouldn’t recommend abandoning your blog in the state I left mine. That’s a gross cheese picture, I know. (Class project!) I wish I had made and posted some brioche, maybe some caramels, or even a bowl of cereal before entering blog stasis.


My “About Me” is now inaccurate; I graduated last June. I will update it when I figure out the best way to talk About Me now. Instead of a student-housing kitchen, I have the pleasures and complications of using my parents’ kitchen. My own dishes and pans remain in the closet under the stairs in our basement, but I claimed one shelf in the kitchen as mine and filled it with my bread-making tools: a bench scraper, a kitchen scale, a thermometer, a small jar of razors, and a kilogram of grey French sea salt.


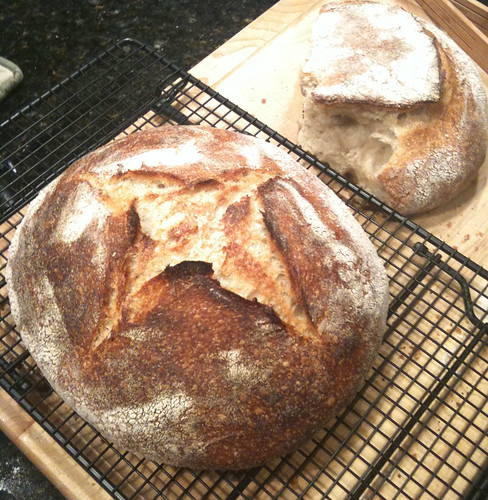
In November, I (I dwelled on this verb choice for a long time since my contribution was mostly inactive) encouraged a small bowl of flour and water to cultivate natural yeast and am the proud feeder/mother of a bread starter/baby. If you think you can keep a gerbil alive, then you have the competence to maintain a bread baby. When things get too hectic, you can store it in the refrigerator for a few days. That’s where mine is now, but mostly because I am lazy, not hectic (a bread baby is a forgiving pet). I will show you the bread, I promise.


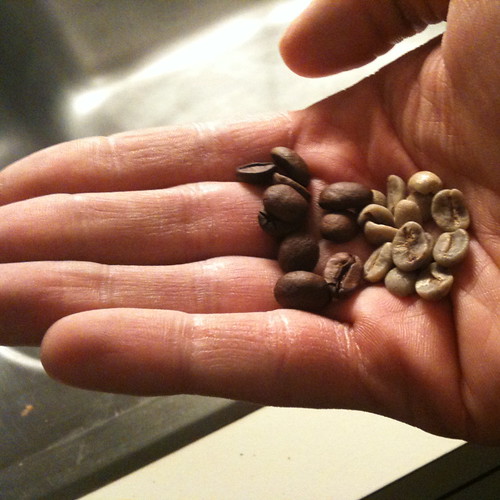
Also, have you ever ignored the intended use of an electrical appliance and made the best coffee of your life? I’ll show you that too. A few promises at a time as we ease back into this. You won’t have to wait until September 2012.


IMG_1240

(A man's hand holding a man's coffee.)

Wednesday, May 12, 2010

Khachapuri


IMG_3876


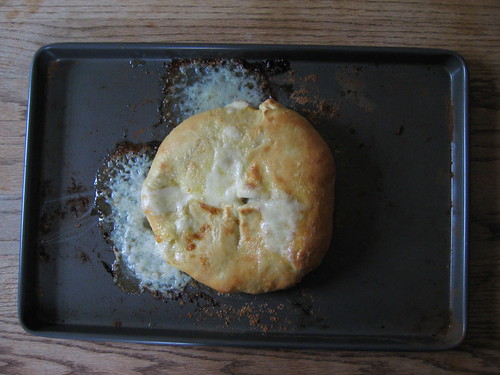
This, my little cheese volcano, is a minimally tamer version of what is often dubbed as a “heart attack on a plate.” Please meet khachapuri, a traditional dish in [the Republic of] Georgia. It’s my invitation to you, a cultural free pass, if you will, to eat a half-pound of cheese. Other regional versions are shaped like boats and topped with egg (don’t worry, you’re not missing out on any calories--this one is painted with butter), and I’ve read that some even come with bacon baked inside. I first ate khachapuri at a Georgian restaurant in Russia, and have since found it at bakeries in Chicago and San Francisco (and, oddly, a chain of restaurants in Krakow, Poland).


IMG_3869


I’m conflicted about sharing this recipe, as it is not entirely authentic. Usually this would not bother me, but khachapuri without the right kind of cheese is perhaps not worth pursuing very far. Georgian khachapuri is filled with a pickled cheese called suluguni, and since I cannot find it near me, I followed Gourmet’s suggestion of mixing Havarti and mozzarella. The combination was “eh,” and I would recommend seeking out suluguni if you are considering this dairy monolith. I ate (shared) my khachapuri on its own since I made it for a project in Russian class (sometimes grad school is awesome), but to round out the meal, you could find a Russian/European grocery store and buy some frozen khinkali (Georgian dumplings), sour cream, and search online for a dish with walnuts and eggplant. Or make shashlik (kabobs)!


IMG_3870


My babushki, the two old women I lived with in Russia, were proponents of the eat-more-butter-because-you’re-not-going-to-be-a-ballerina-anyway approach to eating. They suggested (actually, yelled) to me that butter is an absolutely integral part of maintaining internal health, as it lubricates your veins and lets your blood flow without any hindrance. This one goes out to them.


IMG_3871


Khachapuri

From Gourmet, May 2008


Ingredients:

2 ¼ tsp active dry yeast (1/4-oz package)

7 tbsp warm water (for this I like to do the “Would you feed this to a baby?” test. If the answer is “I don’t know,” you can run the water against the back of your wrist; it should feel neutral--not hot or cold. Now you know how to be nice to yeast and babies!)

1 2/3 c unbleached all-purpose flour, set 1 tbsp of this aside

¾ tsp salt

1 large egg

¼ lb Havarti cheese, grated

¼ lb salted mozzarella, grated (if your mozzarella is not salted, you will have to play around with the added salt proportions)

1 tsp unsalted butter, melted


Directions:

Mix yeast into warm water and add 1 tbsp of flour. Let stand until yeast is activated (the mixture will look creamy and bubbly).


Stir flour and salt together in a large bowl, add egg and yeast and stir to form dough.


Flour a surface in your kitchen (I just used a cutting board), and knead the dough until elastic. When I made my Russian presentation on khachapuri, I found a baking phrase that means “until the dough is ready for further manipulation,” which I liked a lot.


Form dough into a ball, dust with flour, and let this sit in a bowl for approximately 2 hours, punching down twice within that time period.


Preheat oven to 475.


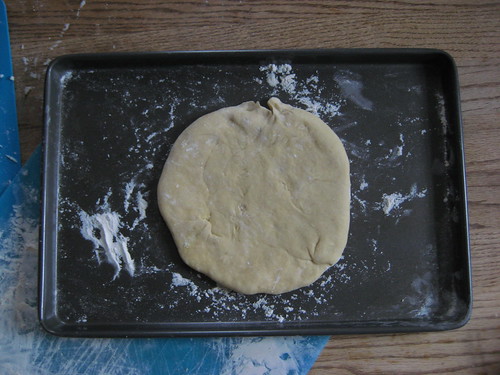
Turn out dough onto your baking pan and flatten into a disk, approximately 7 inches across.


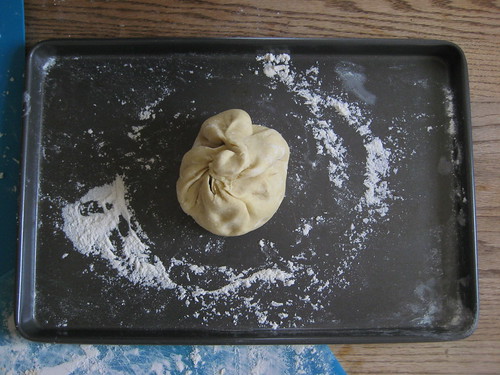
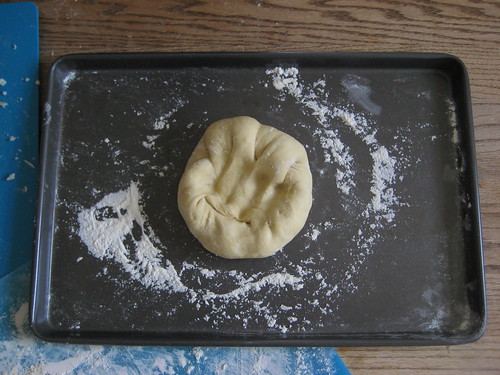
Take your grated cheeses and press into a tight ball. Place the cheese ball in the center of your dough disk, gather the dough up around the ball, and twist into a knot. Push down on the center of the ball with fist, and continue to spread the cheese out with your hands until you have a dough disk that is approximately 8 inches across. I used a rolling pin after the cheese was evenly distributed so ensure a smooth, round disk.


Cut an X through the top of the dough to expose cheese. Be careful not to cut through the whole disk! Put in the oven until lightly browned, for about 10 minutes. Brush dough with melted butter and cook for 5 minutes more.


The cheese is molten at this point, so let the khachapuri cool until it won’t burn your mouth. Cut into wedges and serve.


Note: Gourmet calls for a floured pizza pan of at least 12 inches or a large, floured baking sheet. I used (surprise) my roasting pan, which was a good call, since the khachapuri turns into a veritable hava-rella eruption in the oven. If I were to make this again, I would not flour the entire pan, as the flour not covered by the dough ended up burning in the 475 degree oven.

Saturday, April 24, 2010

Roasted Potatoes with Garlic, Tomatoes, and Green Beans

IMG_3853


My dad likes precision. If I do not give a straight numeric answer to questions--how many miles to the hotel from Nevsky Prospekt, how many rubles for a taxi--he will protest with, “Well is it more than one, or fewer than a thousand?” Eventually I’ll reach a satisfactory number--fewer than two miles, forty dollars if you’re lucky--and I’m reminded that what is familiar to me needs concrete grounding in order to be understood.


IMG_3848


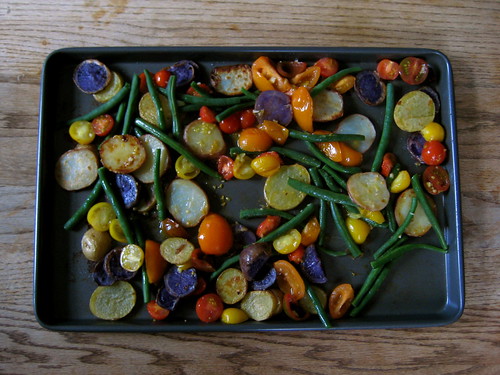
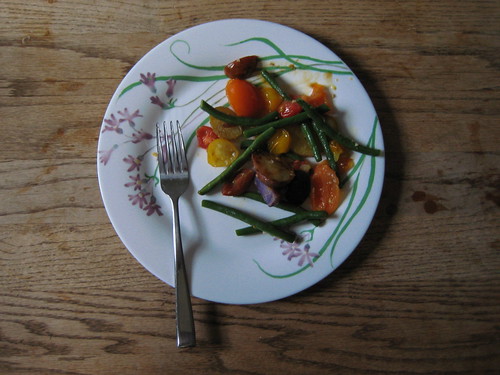
I’ve been making this recipe for years (more than one, fewer than a thousand), and have never written it down. I use enough potatoes to fill the pan without overcrowding, as many tomatoes as will fit, and a few fistfuls of green beans. (I’ll confess to looking back at the pictures and counting tomatoes and green beans so I could capture this recipe.) It’s extremely flexible to what you have around you, and I bet it would be delicious if you substituted other herbs (or vegetables, but then you’d have to change the title…)


IMG_3851


Roasted Potatoes with Garlic, Tomatoes, and Green Beans


Ingredients:

Olive oil

Small potatoes (about a pound and a half)

Cherry tomatoes (one carton, or approximately twenty)

Green beans (thirty-one?)

2 garlic cloves (or more!) (or fewer!)

Basil (optional, but when you use it, a fourth cup of chopped basil is usually enough)

Kosher salt to taste

Freshly ground black pepper to taste


Directions:

Set oven to 400 degrees.


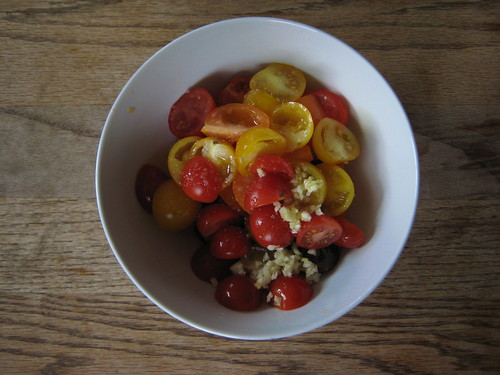
While the oven is heating, slice cherry tomatoes in half. Crush and mince garlic (give them a good whack--unpeeled--with the flat your knife blade, take off the peel and mince them). Put tomatoes in a bowl with garlic and mix.


Slice potatoes thinly--approximately ¼ inch thick. Throw them into a bowl with a few glugs (enough to coat, or about three tablespoons) of olive oil and salt those guys. Scatter potatoes onto a rimmed baking sheet (sprayed with nonstick spray if you want; I didn’t and everything turned out okay) and put in oven for approximately 40 minutes, or until potatoes are starting to crisp. Make sure you mix the potatoes approximately every ten minutes so they get evenly cooked.


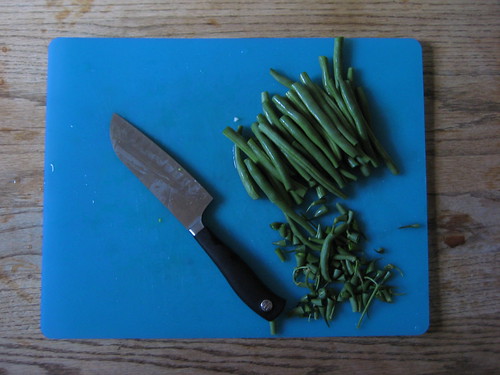
Cut the ends of the green beans and boil them until they are fork-tender. Drain and put aside (this works nicely if you start the beans and time them to finish around when the potatoes are almost finished.)


When the potatoes are crispy and brown (but not all the way done), take the roasting pan out of the oven and mix in the tomatoes and green beans. Put back in the oven until everything is warm (ten minutes or so). Salt and pepper to taste, and top with chopped basil.


Notes:

You should scale the recipe down if you’re eating for one. The leftovers are never as good as the first day.


IMG_3854


Wednesday, April 14, 2010

No recipes yet, just a pan.

Hi, I’m Lauren. How do you start a blog? I can already tell that the hardest part about writing to empty space is the trepidation I feel in every word I type. If it’s like a letter, then dear who? Dear anyone? (Desperate!) Dear someone? (I don’t have anyone in mind!)

Let’s go with:

Dear friends,

Tonight I baked banana bread so mindlessly that I poured the melted butter into a bowl of cold ingredients and it seized into tiny butter pieces. It’s for reasons like this that I haven’t written before. I’ve been waiting to start writing about food until I had a nicer camera, better lighting, more experience, a kitchen of my own, but that’s a long way off, and that bread was still delicious. I am eight weeks from finishing graduate school, and dinner still has to happen here about sixty more times.

I moved here with two suitcases and no kitchen utensils for the year (I suppose that’s not much of a testament to my interest in food; my hope chest of kitchen-goods is in hibernation in my parents’ basement). Here is where blogs get tricky; I can’t talk about food without getting autobiographical, but how much do you get to know?

Let’s start with what I have:

One roasting pan, prone to warping.

That is all I bought because I live with three girls who have their own kitchen supplies (thank goodness (but: have you seen a refrigerator shared by four people who don’t share food?)). My kitchen experiences have almost uniformly been those of adaptation and simplicity. I had some good years of kitchen access in college, but when I lived in Russia, I didn’t have access to a refrigerator and created a makeshift one with plastic bags and a rope thrown out my window into the St. Petersburg January. (Here is my most developed recipe from that winter: one finger, one jar of Nutella. And I guess I should add that the two old women I lived with fed me, but more on them, and everyone, later.)

Every time I lose space and comfort in the kitchen, I return to the kitchen refrain of salt and roast.* Why boil or steam when you can get the crispy and caramelized glory of a high-heat oven? Show me a vegetable you can’t roast, and I’ll show you a vegetable I won’t eat…okay, I will, if it’s not a red onion.

My hope for these entries is that I will be able to cultivate the hobbies (namely, writing and cooking) that often lose when put up against the prospect of an afternoon nap. I will share with you cardamom bread, roasted tomatoes, and fruit crisps, but also the reassurance that no matter where you are, with some salt and a misshapen pan, you can make something good.

*This is like the part in movies where the title is unabashedly mentioned.